Ubuntu ARM64 on Raspberry Pi CM4 with NVMe SSD

As you can imagine from the number of acronyms in the title, this took a huge amount of fiddling and was very confusing, so documenting it here for my own benefit and others’. πŸ™‚

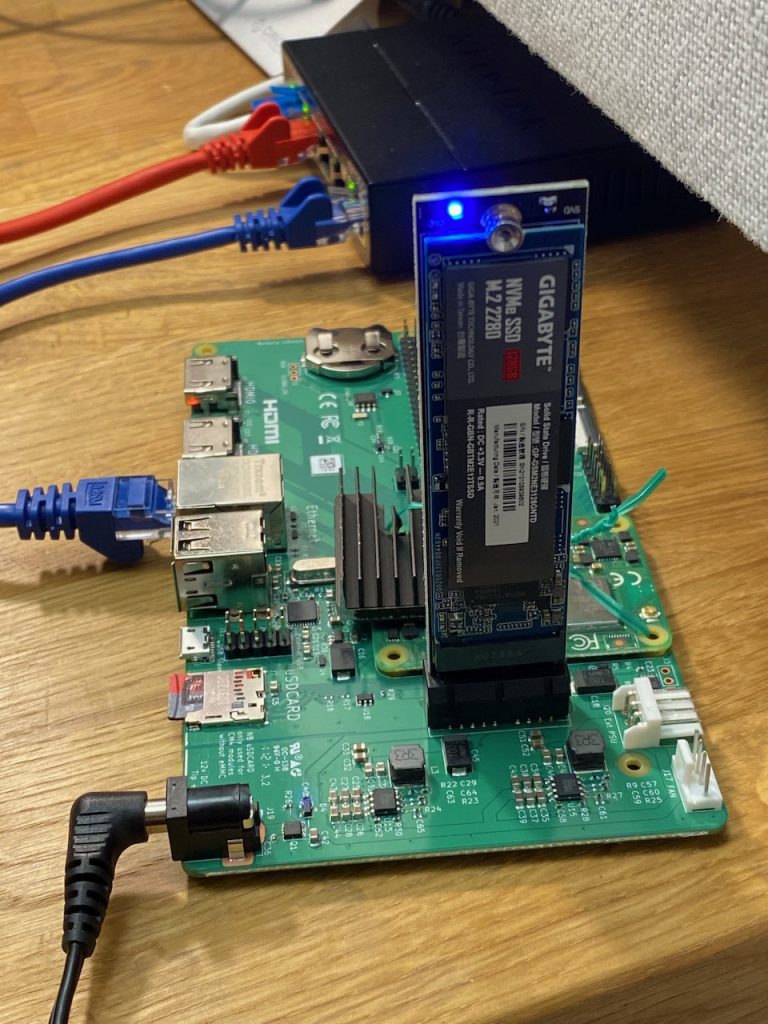
Those blue LEDs >_<

I wanted to run Ubuntu Server ARM64 on a Raspberry Pi CM4 dev board using a NVMe SSD for at least the root filesystem (and ideally booting from it)

Step 1: Update the CM4’s bootloader firmware

The CM4 probably has an older bootloader firmware installed from the factory that doesn’t support NVMe. This step is best done from a Linux PC: I used an old Acer laptop running Zorin 16. The below commands are to be entered in a terminal window:

First you need the latest version of the Raspberry Pi USB boot tool. This has to be built from source, and you may need to install some dependencies first (-1000 geek points if you didn’t already have git and build-essential πŸ™‚ )


sudo apt install git
sudo apt install build-essential
sudo apt install libusb-1.0-0-dev

Now it’s time to build the USB boot tool from source…

git clone --depth=1 https://github.com/raspberrypi/usbboot
cd usbboot
make

Now you need to edit the boot order settings and get the latest EEPROM image. This part is adapted from this tutorial which doesn’t work verbatim any more (the “nvme” folder doesn’t exist in the usbboot repository, but substituting the “recovery” folder works)

cd recovery
sed -i -e '/^BOOT_ORDER=/ s/=.*$/=0xf25416/' boot.conf

NVMe on Raspberry Pi is still kind of bleeding edge, so it’s best to use the newest versions of everything. pieeprom-2021-07-06.bin was still the latest image at the time of writing:

rm -f pieeprom.original.bin
curl -L -o pieeprom.original.bin https://github.com/raspberrypi/rpi-eeprom/raw/master/firmware/beta/pieeprom-2021-07-06.bin
./update-pieeprom.sh

Note: At this point the update script crashed complaining that it couldn’t find Python. I guess Zorin 16 removed Python 2.x and forgot to make Python 3 the default? The python-is-python3 package fixed that for me. Hopefully your Linux distro has a functioning “python” already, in which case don’t execute this command, it’ll probably break something!

sudo apt install python-is-python3

Finally it’s time to burn your changes to the CM4… The “disable eMMC Boot” jumper must be fitted on J2 for this to work (Unless you have a CM4 Lite I guess…)

cd ..
sudo ./rpiboot -d recovery

Now connect the CM4 Dev board J11 “USB Slave” to a USB port of your Linux PC and apply power to the 12V DC input.

The rpiboot tool should boot up the CM4 over USB and flash the new EEPROM image and boot order settings. Once the command line spew stops and the power LED on the dev board starts to blink rapidly, the process is complete and you can disconnect power.

Step 2: Try to boot from NVMe, fail

At this point I already had an ARM64 Ubuntu 20.04 LTS image downloaded from here and uncompressed to my Gigabyte GP-GSM2NE3128GNTD SSD. So I removed the SD card from my CM4 dev board and tried to boot from the NVMe.

I got a surprisingly informative error message from the Raspberry Pi bootloader (on a monitor connected to HDMI0)

start4.elf is not compatible. nvme boot requires newer software

A bit of Googling got me to this forum thread:

So my first attempt at a fix was to update a 32-bit Raspbian SD card image with rpi-update and then copy the start4.elf and fixup4.dat files from that image to the NVMe boot partition. This got me to the next problem: The Ubuntu 20.04 image uses a version of U-Boot that doesn’t support NVMe, so it just sticks waiting for a boot device.

Next I tried downloading the Ubuntu Server 21.04 image and burning it to a SD card. I planned to go through the full process documented in the forum thread, starting with upgrading the Ubuntu image, so I inserted the SD card and powered up.

Step 3: Unexpected success

Imagine my surprise when it booted into Ubuntu 20.04 from the NVMe instead of 21.04 from the SD card as I was expecting. πŸ˜€

I guess what must have happened is that the boot partition on the 21.04 SD card had a version of UBoot that recognised the NVMe and treated it as a higher priority than the SD.
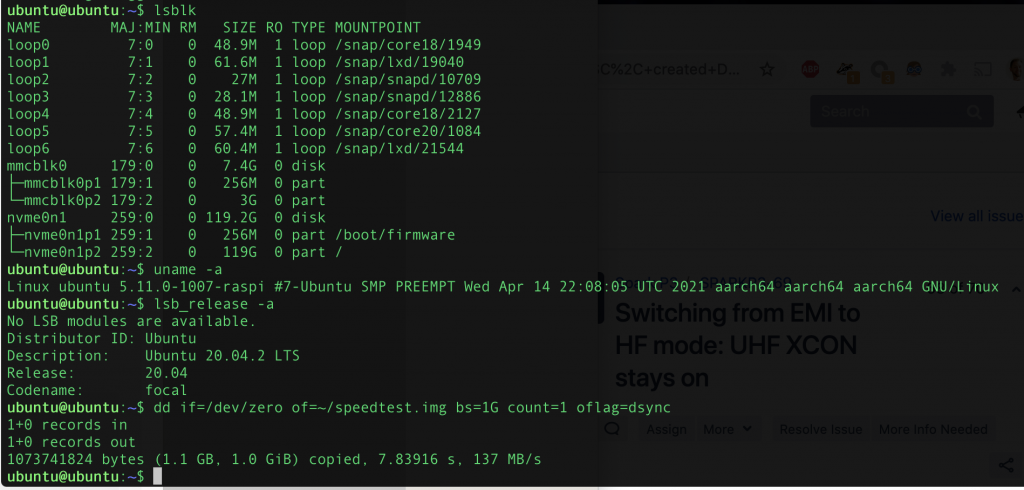
Confirming that the SD card is unused and root filesystem is on the NVMe SSD. It’s fast 8)

The next gambit would be to copy the boot partition from the SD card to the NVMe and see if it can boot directly from NVMe. But it works well enough as is, I don’t want to break it! This is left as an exercise for the reader πŸ˜‰

Step 5: Try to make it boot directly from NVMe

Unfortunately on subsequent boots it flipflopped between NVMe and SD card as the root partition. So I thought since it’s Friday afternoon I should try to get it to boot directly from NVMe.

I started by deleting all files in the boot partition on the NVMe and replacing with the ones from the Ubuntu 21.04 SD card. The kernel is in /boot/vmlinuz, while the modules are stored on the root filesystem, so this would normally cause the modules to fail to load, except I noticed that I somehow managed to update the Ubuntu 20.04 installation on the NVMe so it was running the same kernel and modules as 21.04.

This still didn’t work, so I went back to that forum thread and replaced start4.elf and fixup4.dat with the ones from the updated Raspbian image.

Finally I got a direct boot from NVMe, with what I guess is Ubuntu 21.04 kernel and 20.04 userland. That works fine for me, I’d rather it ran a LTS version of Ubuntu.
The Carbon Hat

Recently work has seen me fiddling with JSON APIs and Python’s requests module. I was also intrigued by the talk of decarbonisation and the banning of gas-fired heating systems.

The received wisdom when I studied this stuff was that it was better to burn fossil fuels in your home directly, than have a power station burn them for you and use the resulting electricity for heating, but maybe the increasing amount of wind energy on the grid has changed things?

While researching this I came across this fine effort by National Grid, Oxford University, WWF, and Environmental Defense Fund Europe. They are using machine learning to forecast the carbon intensity of electricity for the UK’s regions up to 48 hours in advance. Interestingly, in spite of the UK having a “national grid”, the carbon intensity can be very different for different regions, as power seems to mostly be consumed in the same region it’s generated. It turns out that living near to one of Europe’s largest wind farms and 2 funky vintage nuclear power stations, the electricity supply to Conner Labs is mostly wind and nuclear and can have a very low carbon footprint indeed.

Since Carbon Intensity didn’t offer a handy regional forecast widget, and JSON APIs are almost fun, the obvious course of action was to grab a Raspberry Pi and make something to inform my electricity consumption decisions.

https://github.com/ConnerLabs/carbonhat The source code is here for your edification and entertainment (?)

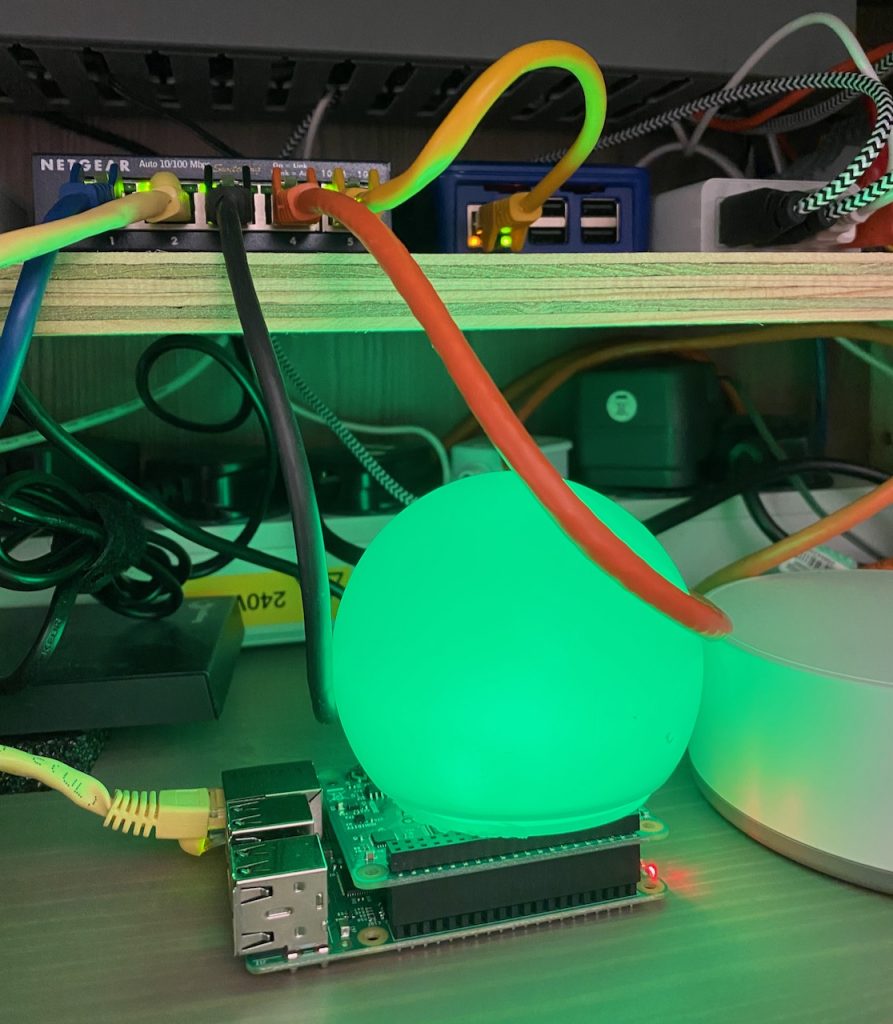
Carbon Hat surrounded by other experimental IoT junk

I found a Sense HAT in my drawer of IoT junk (some might say it’s more like an entire building than a drawer) so I used the RGB LED matrix on that to display the result. It fades from green at an intensity of 0, through to red at 215g CO2/kWh, which is approximately the carbon footprint of natural gas burnt for heating. All LEDs are programmed to the same colour, and it is covered with a globe from a broken LED light bulb to make it look like a single light source.

Carbon Intensity’s forecasts are updated every half hour, so I pull the 24 hour regional forecast from their API a few minutes after each half hour, and crunch it down to a single number representing the average carbon intensity for the next 3 hours.

Reaping time and sheeping time

Dear reader, I apologise for the lack of blogging recently. Here is a double helping.

First of all, I’ve been having great fun with Reaper. Digital audio workstation software written by the charmingly named Cockos Inc. I remember trying an early version years ago and hating it, but it has come a long way. I’ve tried most of the DAWs, and I think Reaper is now my favourite, especially when you can buy a personal-use license for 60 bucks! (I bought it.) It is available for Mac and Windows, and the bundled collection of plugins isn’t half bad.

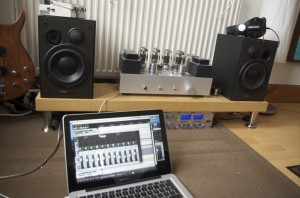
My Reaper recording setup.

To all electronics experts reading, I apologise for placing the setup so near a radiator! πŸ™‚

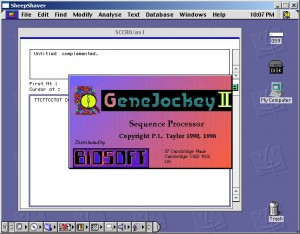
So that’s reaping time, but what about the sheeping time? Well you know the old problem, when you need to edit the DNA of a cloned sheep but all you can find is an ancient gene splicing program that runs on classic Mac OS. Happens to us all.

I obtained a copy of the SheepShaver Mac emulator for Windows, and a ROM file and ready-to-use Mac OS 9 disk image from redundantrobot.com. I put it all on my old Windows laptop for a test. And, it werked!

GeneJockey 2 running in Mac OS 9 on the SheepShaver emulator.

Scripting fun: Rename files by date in Windows

When I’m working on a computer, I frequently make backups of what I’m doing. There are a lot of ways to do this, but the one I use is a bit ghetto.

1. Right click the folder with my work in it, and select “Send To > Compressed (zipped) folder”

2. Rename the resulting zip file so that the name includes the date in ISO format. You have to rename it in order to store multiple versions in the same place, so might as well add some useful data to the name.

3. Copy it to a backup drive somewhere.

I got fed up of doing the renaming manually, so I created (cobbled together from various Howtos) a batch file to do it for me. Here’s the code:
@echo off
FOR %%V IN (%1) DO FOR /F "tokens=1-6 delims=/: " %%J IN ("%%~tV") DO IF EXIST %%~nV-%%L%%K%%J-%%M%%N%%O%%~xV (ECHO Cannot rename %%V) ELSE (Rename %%V %%~nV-%%L%%K%%J-%%M%%N%%O%%~xV)

Paste that all into a text file (one long line!) and call it something like RenameByDate.bat.

Now, if you drag and drop another file onto this batch file’s icon, it should get renamed to its original name, plus the date and time of its timestamp.

If this doesn’t work, you may need to enter the following three commands at a command prompt, to enable drag and drop for batch files.
ftype batfile="%1" %*
assoc .bat=batfile
regsvr32 /i shell32.dll

(from here)

Finally, place the batch file in your Send To folder. (C:\Documents and Settings\YourUserName\SendTo)

Now you can rename any file, adding the date and time to the name, by right-clicking it and selecting “Send To > RenameByDate.bat”.

In other news, I’ve mostly been automating Bill Of Material generation with Perl.

Less is More: Pay More, Get Less

‘What can we design that makes our life better, not just “more”‘ – Treehugger.com

I recently read Treehugger’s debate on Nikon’s decision to stop making film cameras. I think it summed up a lot of things I’ve been dealing with lately, so I decided to do some blogging about it.

If you live in the developed world in the 21st century, as I do, you probably know all about “more”. More megapixels, gigabytes and gigahertz every couple of years. Cell phones that can surf the net, whether you actually want to or not: I’ve covered this issue before.

But there’s another kind of more that I find even more insidious: More features on our software and consumer gadgets. Once a designer puts a microprocessor into a gadget, he can add extra features by just adding more computer code. These features add practically no manufacturing cost to the end product, while they can still be used as selling points by the advertising guys, so the result is a kind of feature arms race.

The downside of this is that buttons, knobs and large displays do add manufacturing cost, so if the designer wants to maximize features per unit cost, he ends up using a very deep and complicated menu system to control his features. Operating an instrument like this can feel like flying a Jumbo jet when your only access to the flight deck is a letterbox-sized hole and a pool cue. More might be better for the sales guys, but it’s definitely not better for the poor end user.

This is possibly the thing I hate most about the information age. Back in the good old days, instruments had one button per function. To listen to music, you grabbed a vinyl record, put it on a turntable, and lowered a stylus onto the track you wanted. The record deck did not suddenly turn into an address book because you accidentally double-clicked the 33rpm button, and make you spend 10 minutes figuring out how to transform it back. In short, each function had a real, material cost in terms of hardware. The result was that designers had to think hard about what functions to implement, and make sure they were really worthwhile.

I’ve never felt this more than in my dealings with electronic music. Synthesizers, samplers and recording software are powered by microprocessors, made for gearheads by gearheads, but a good musical performance needs an intuitive, gut-level connection between the musician and the instrument. There is very little time for double-clicks or multi-level menus, unless you’re Kraftwerk.

I’m “lucky” enough to own some of the worst excesses of the 90s, like the Yamaha A4000 sampler. It has the jumbo jet syndrome in spades: it took me a good six months to get comfortable working my way round the user interface, in so far as you could get comfortable at all. It bombed, to the extent that fully loaded examples can be found on Ebay for about $250. (I’m keeping mine.)

The polar opposite of this would be a “classic synth” that does one thing and does it very well. Sometimes this isn’t even what the designer intended it to do, as in the case of the legendary TB-303. Its built-in pattern sequencer was so awful that very few people had the patience to program more than a few two-bar loops. The tone generator only had five knobs to change the sound – six if you count the tuning – but those few adjustments were carefully chosen and delightfully tweakable.

These built-in limitations led to the birth of acid house music, and the 303 has kept its resale value a lot better than the A4000 πŸ™‚